Electric storage water heaters are household appliances for hot water supply. They are used to create a stand-alone hot water supply system. They are also useful in apartments with a centralized hot water supply system as a backup hot water source. Installation can be done independently with minimal skill. Learn how to connect a water heater in our article.
Operating principle
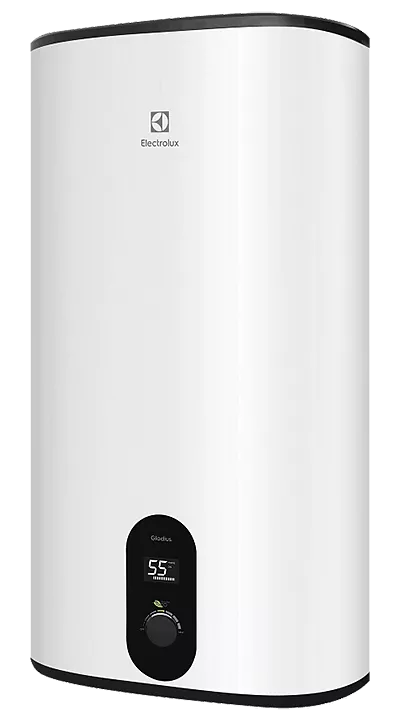
A storage water heater is a steel or ceramic tank with a built-in heating element. The tank is housed in a thermally insulated housing, which maintains the temperature of the heated water and reduces energy consumption.
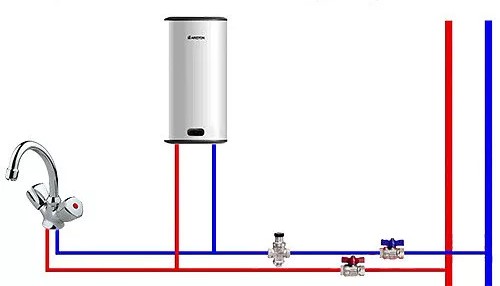
The boiler has two connections. One is used to connect to the water supply via a safety valve, which protects the tank from water hammer. The second connection supplies heated water to faucets or other water draw-off points. The inlet connection enters the bottom of the tank, and the outlet connection, via a suction tube running inside the housing, is connected to the top. This connection is constantly under the operating pressure of the water supply system.
Water fills the tank and is heated by the heating element. When the user opens the faucet, the hot water in the tank is displaced by cold water from the water supply and flows to the faucet. The heating mode is set by the user using the control system, which automatically maintains the desired temperature.
Therefore, it is necessary to install it, connect it to the water supply and electrical network, and connect the wiring to the outlet fitting.
Installing the Water Heater
Before starting work, you need to select a location for installing the water heater. The location should be chosen so that the large unit doesn’t interfere with the surrounding area and takes up minimal usable space. Furthermore, it is recommended to position it so that it is easily connected and the connecting piping is kept to a minimum. Access for maintenance must be provided.
Manufacturers recommend installing a vertical water heater with at least 50 cm of free space underneath and at least 5-10 cm of clearance from the ceiling and side walls. When installing a horizontal unit, ensure a minimum clearance of 50 cm from the wall on the side where the water heater’s connections are located. Minimum clearances on other sides should be 5-10 cm.
The method of mounting the unit to the wall depends on the load-bearing capacity of the wall and its weight.
The following methods are used for walls made of different materials:
- Concrete or brick walls. Attached with expansion anchors and bolts. Drill holes at least 7 cm deep in the wall at pre-marked locations along the appliance bracket, and insert anchor bolts into the holes. The appliance is then secured to the bolts with nuts. For installing small water heaters with a single bracket, standard plastic anchors with hooks can be used.
- Log or timber walls. Installation is carried out using hooks or bolts that are screwed directly into the prepared holes in the wall.
- Walls made of foam concrete, aerated concrete, and other porous materials. Water heaters with a capacity of up to 50 liters can be suspended using plastic anchors for foam concrete. Units with a capacity of over 50 liters are mounted using special metal anchors and bolts. Chemical anchors can be used on walls made of large-pore materials, such as ceramic blocks. If the water heater is installed in a boiler room or other utility room, it is recommended to support it on supports.
- Partitions made of plasterboard or OSB are attached to pre-installed anchors. A unit with a capacity of up to 50 liters can be attached to a metal plate screwed to the frame profile at 6-8 points. Another mounting option is to use Molly anchors of the appropriate length.
Installation must be performed level. Therefore, careful attention to detail is required when pre-marking the mounting locations and drilling the holes.
Connecting to the water supply
A crucial step in installing a water heater is connecting it to the water supply. This is done after the unit has been hung on the wall and securely fastened.
The unit must be connected via a pressure relief valve or safety group. This is necessary to protect the boiler tank from excessive pressure, such as during water hammer or when the water overheats due to a thermostat failure. Manufacturers recommend connecting the valve directly to the boiler inlet, without installing any additional valves, fittings, or piping in between. Horizontally mounted water heaters are an exception. When installing such units, an elbow is first screwed to the inlet fitting. This is necessary to ensure the outlet of the pressure relief valve points downward. To seal the connection, it is recommended to use flax or plumbing thread.
A ball valve is installed upstream of the pressure relief valve. This allows the unit to be quickly shut down in the event of an emergency, for maintenance, or for repairs.
Union nuts are used to connect the pipes to the valve and outlet fitting, allowing for a detachable connection. Flexible hoses can be used to connect the water heater to the water supply. However, it is more reliable to install permanent pipes. This will eliminate the risk of leakage if a hose breaks.
When installing the boiler, connect a flexible tube to the outlet of the pressure relief valve to drain water when the pressure is released. The other end of the tube should be connected to a drain or a transparent container, such as a jar or plastic bottle, for testing purposes.
After completing the connections, turn on the water pressure and completely fill it with water, turn on the hot water at the faucet, and check the tightness of all connections.
Features of installing a boiler in an autonomous water supply system
A house with an independent water supply system has certain installation and connection considerations. The water source is a storage tank, typically installed on the top floor or attic of the house.
The connection diagram depends on the height difference between the water heater and the storage tank. If the difference is less than two meters, a tee is installed in the section of the pipe between the units (above the water heater). From this tee, part of the flow is directed to the water heater, and the other part is directed to the cold water supply. If the height difference is more than two meters, the tee is installed below the water heater.
Before installation, the pressure in the independent system must be checked. If it exceeds 6 bar, the water heater must be supplied through a pressure-reducing reducer.
Connecting to the power grid
Electrical connection is made to a 220V network in compliance with electrical safety standards. Given the high power of the appliance, it is recommended to install a separate cable line from the control panel. A three-core copper or aluminum cable is used for this purpose. The cross-section of the cable is selected based on the power consumption of the boiler. To safely connect the appliance to the network and ensure long-term operation, it is important not to skimp on cable quality. Its length should be selected with sufficient reserve to ensure tension-free routing from the control panel to the boiler.
The water heater can be connected directly to the cable. To access the contact terminals, remove the lower cover on the housing. Then, connect the cable wires to the terminals. The unit must be installed with a ground connection. If the boiler is supplied with a factory-installed cord and plug, a socket can be installed for its connection. When installed in a bathroom, the socket must be waterproof and grounded. The socket location must be chosen to prevent flooding in the event of an accident or a leak in the pipeline.
When installing an electric water heater, protective devices are mandatory. To protect against short circuits, the water heater is connected to the power grid via a two-pole circuit breaker with a tripping current of 30 mA. Additionally, a residual-current device (RCD) is installed to protect against electric shock. Adherence to electrical connection rules during installation will ensure the safe operation of the appliance for many years.